Steal These 14 Rustic Backyard Ideas That Look Expensive but Aren’T
Your backyard can look designer without the designer price tag. These rustic ideas bring texture, warmth, and wow-factor with materials you can thrift, salvage, or DIY. We’re talking high-impact, low-cost upgrades that make neighbors ask for your contractor’s number. Spoiler: it’s you.
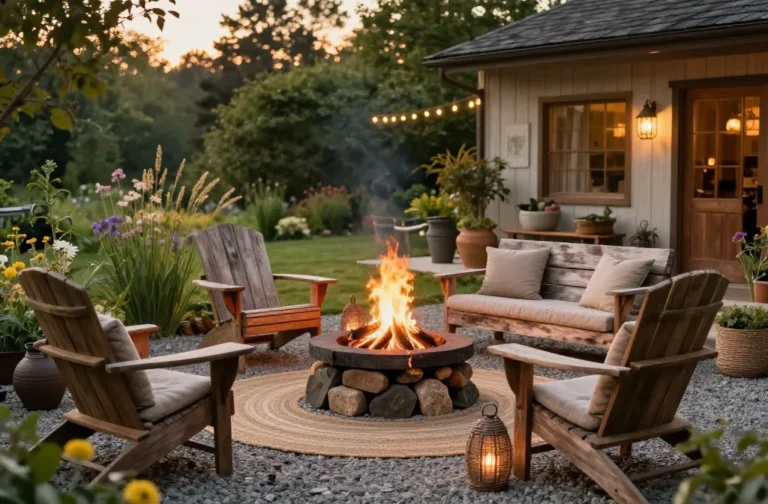
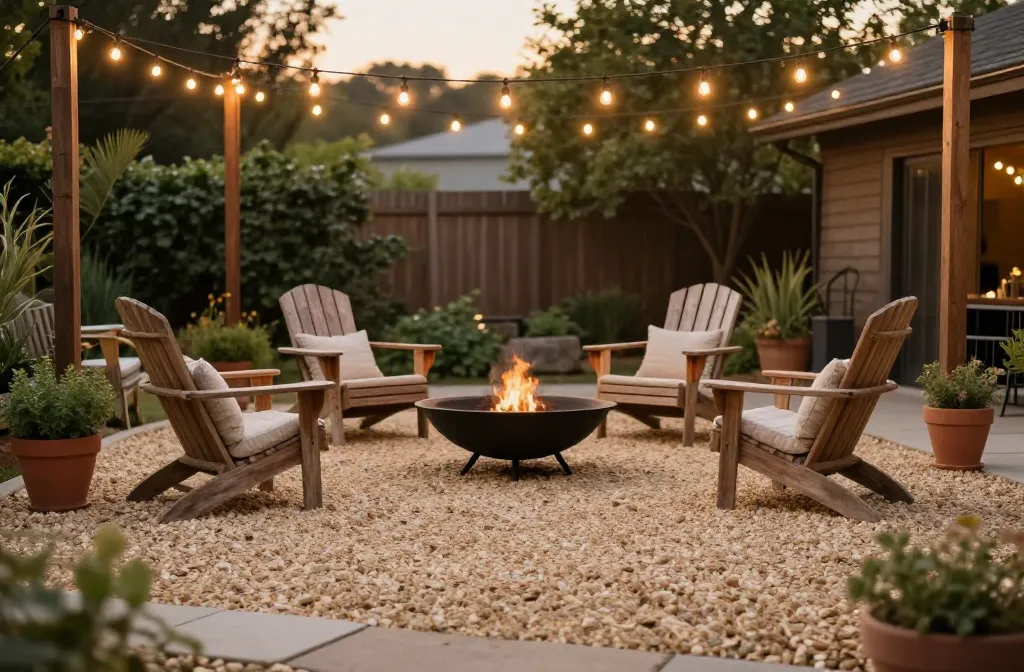
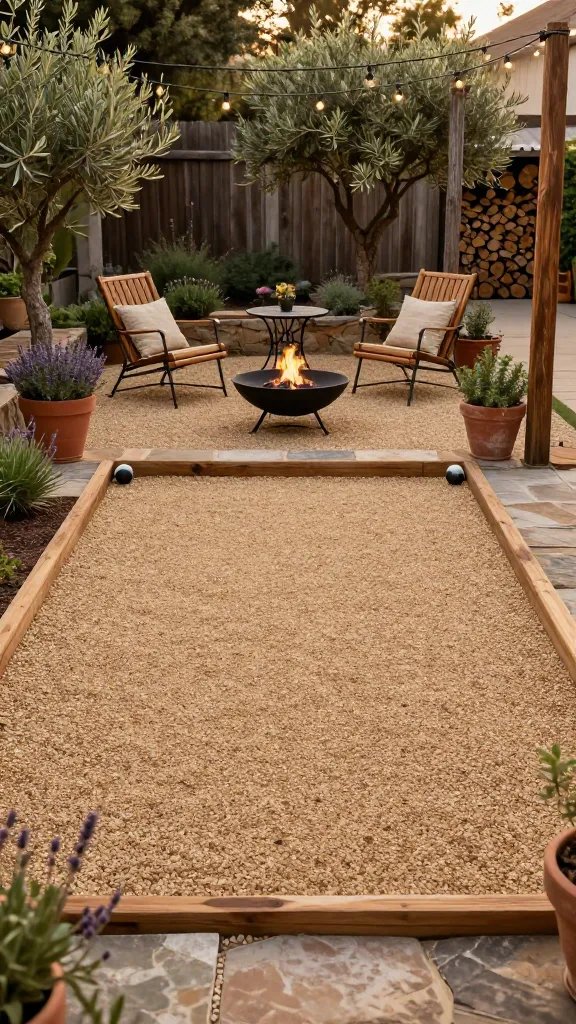
1. Build A Crushed Gravel Lounge Zone
Tired of snacking when you’re not even hungry? This reset helps you stop the loop and feel back in control.
A simple reset for moments when cravings take over. Easy to use, easy to repeat, and designed to help you feel satisfied instead of stuck.
Want a chic “European courtyard” vibe without pouring concrete? Lay landscape fabric, dump pea gravel, and outline with pavers or pressure-treated edging. It drains well, looks tailored, and costs way less than a deck.
Tips
- Compact the base with a hand tamper for a solid feel.
- Choose warm-toned gravel for a rustic look.
- Add a simple fire bowl or bistro set for instant ambiance.
Use this for dining, seating, or a game area. It reads custom and hides uneven ground like a champ.
2. String Market Lights Like A Designer
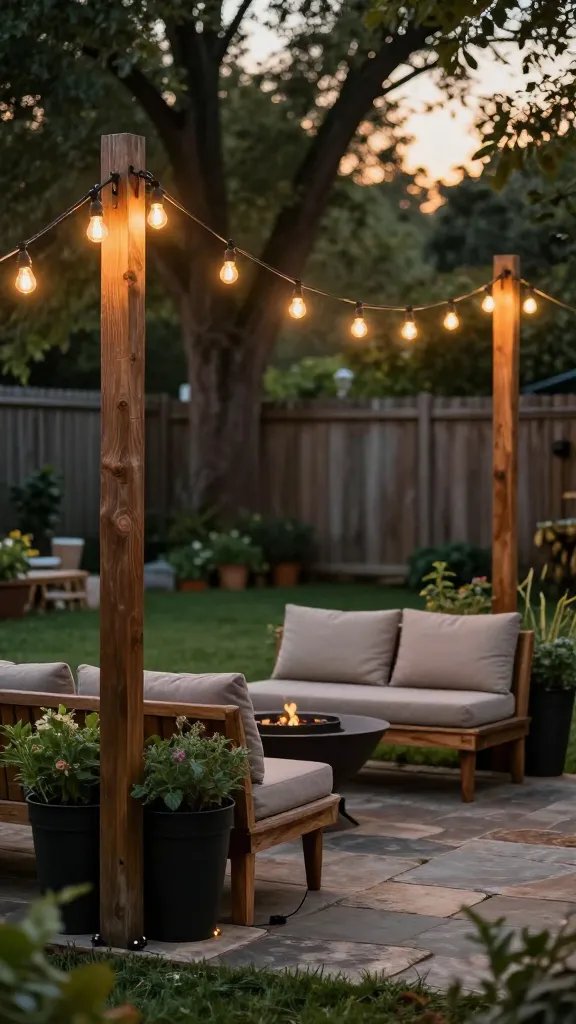
Nothing upgrades a yard faster than cafe lights—seriously. They add mood, structure, and a little romance for the price of takeout and a Saturday afternoon.
Transform Your Home With 7,250+ Stunning Landscaping Designs—No Expensive Designers Needed!
- 🌿 Access 7,250+ stunning landscaping designs.
- 💰 Save thousands—no pro designer needed.
- 🏡 Plans for gardens, patios, walkways, and more.
- ✨ Simple, beginner-friendly DIY layouts.
- 🛠️ Customize any design to fit your yard.
Key Points
- Mount to stained 4×4 posts set in planters or with ground spikes.
- Use shatterproof warm bulbs and a dimmer plug for control.
- Crisscross in a V-pattern over seating to make it feel intentional.
Perfect for tiny patios or big lawns. You’ll linger outside way longer, FYI.
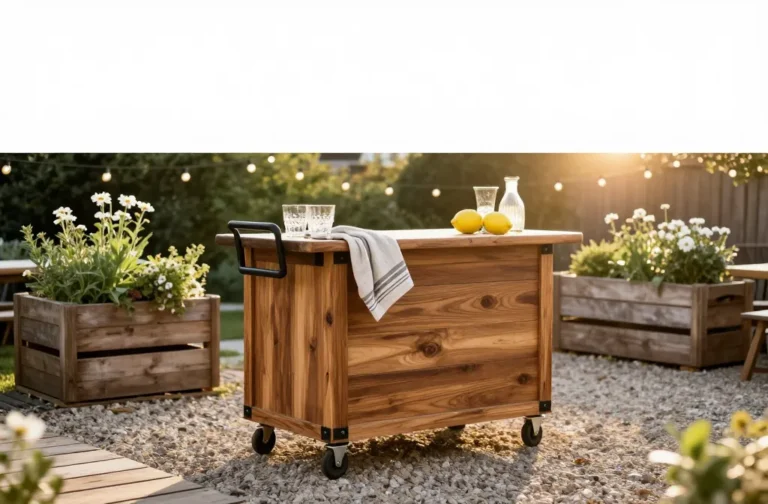
3. Add A Salvaged Door Potting Bench
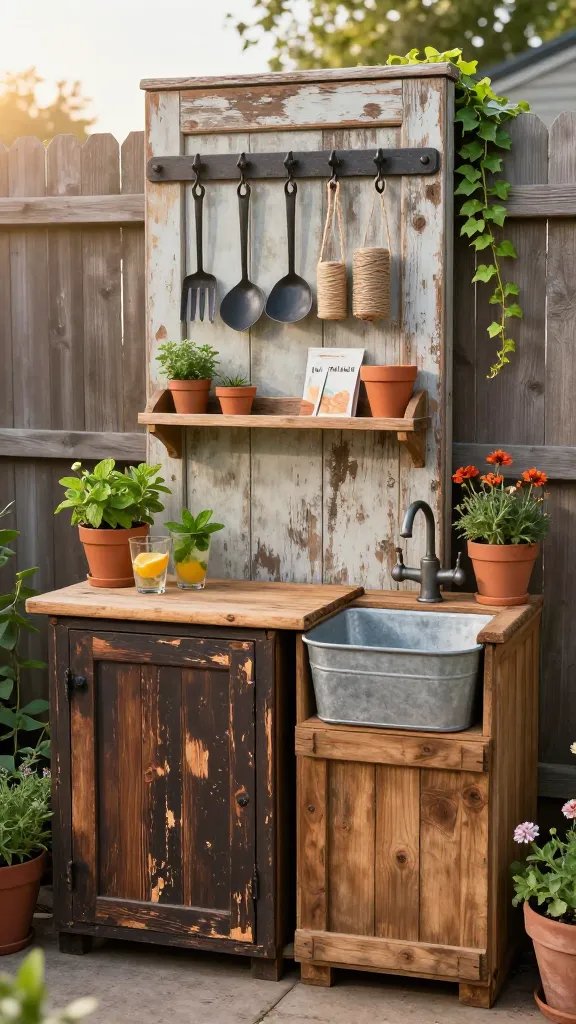
Turn an old door and two crates into a rustic potting station that doubles as a bar. It looks antique-shop fancy without the markup.
Materials
- Weathered door or shutter
- Two sturdy crates or a thrifted console
- Hooks, screws, and a scrap wood shelf
Stain or limewash for character, add a metal bucket sink if you’re extra. Great for garden storage, drink mixing, or a plant wall moment.
4. Create A Layered Planter Mix
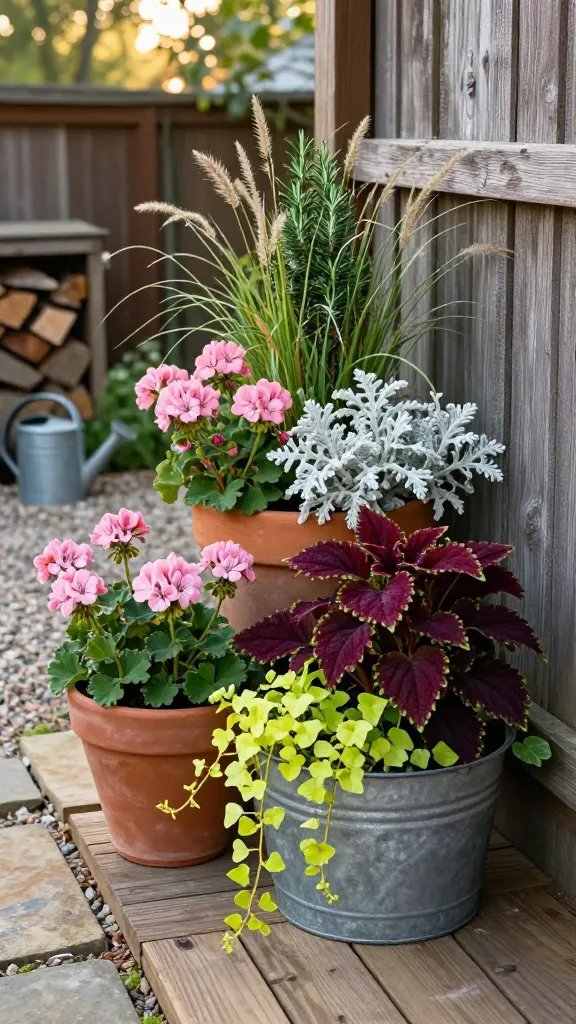
High-end gardens stack heights, textures, and colors. You can fake that look with thrifted pots and smart plant choices.
Design Formula
- Thriller: tall grass or rosemary topiary
- Filler: geraniums, dusty miller, or coleus
- Spiller: ivy, sweet potato vine, or creeping jenny
Group odd numbers of planters and repeat colors for cohesion. It screams “landscape architect” on a lemonade budget.
5. Build A Simple Cedar Slat Privacy Screen
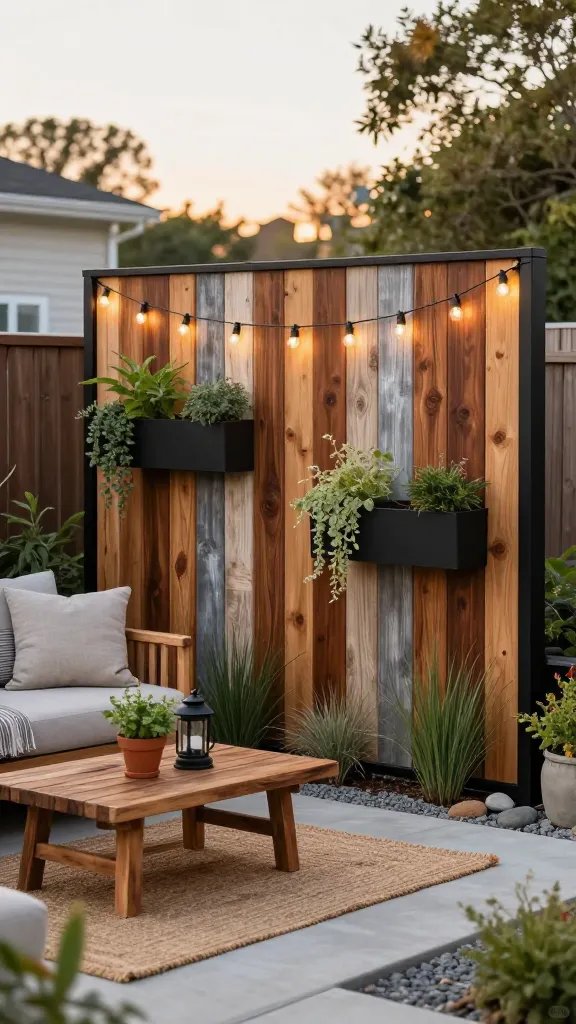
Hide the fence, AC unit, or your neighbor’s inflatable unicorn. A cedar slat screen looks custom and modern-rustic, and you can build it with basic tools.
Tips
- Use 1×2 or 1×3 cedar, spaced 1/2 inch apart.
- Stain in warm walnut or leave to silver naturally.
- Mount planters or string lights on it for layers.
Use behind seating for a lounge feel. It frames the space and instantly looks spendy.

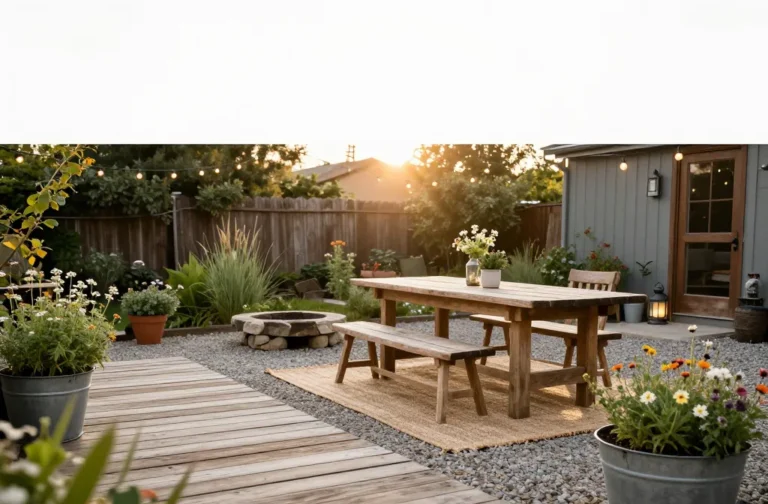
6. Lay A Brick Herringbone Path With Reclaimed Pavers
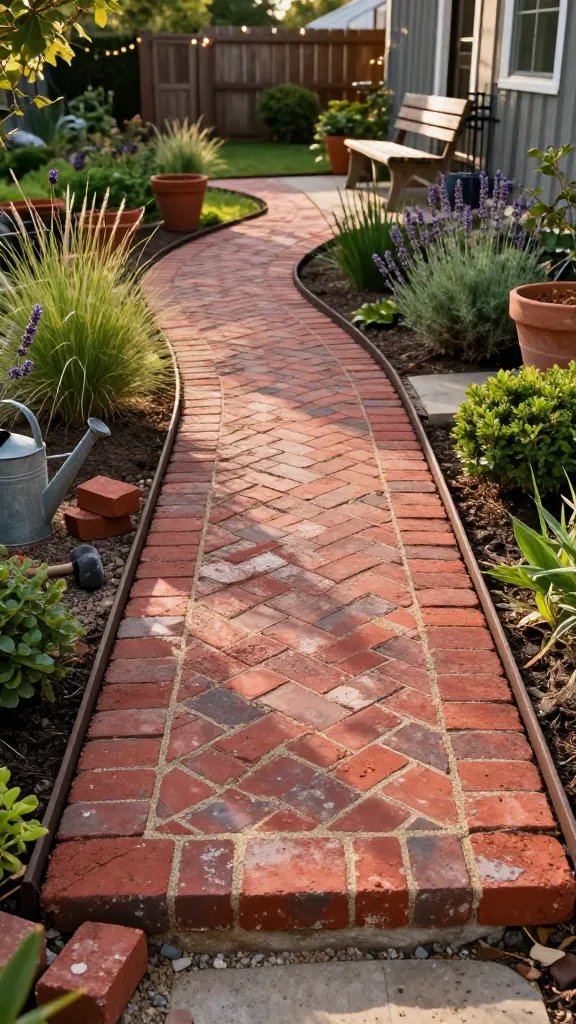
Reclaimed brick costs less than new stone but oozes charm. A herringbone pattern looks luxe and guides the eye through your yard.
Materials
- Reclaimed brick pavers
- Paver base and sand
- Edging to lock it in
Set them tight, tap level, and sweep sand to finish. This adds major curb appeal on a DIY budget—IMO it’s the best bang for your buck.
7. Upgrade Furniture With Wood + Canvas
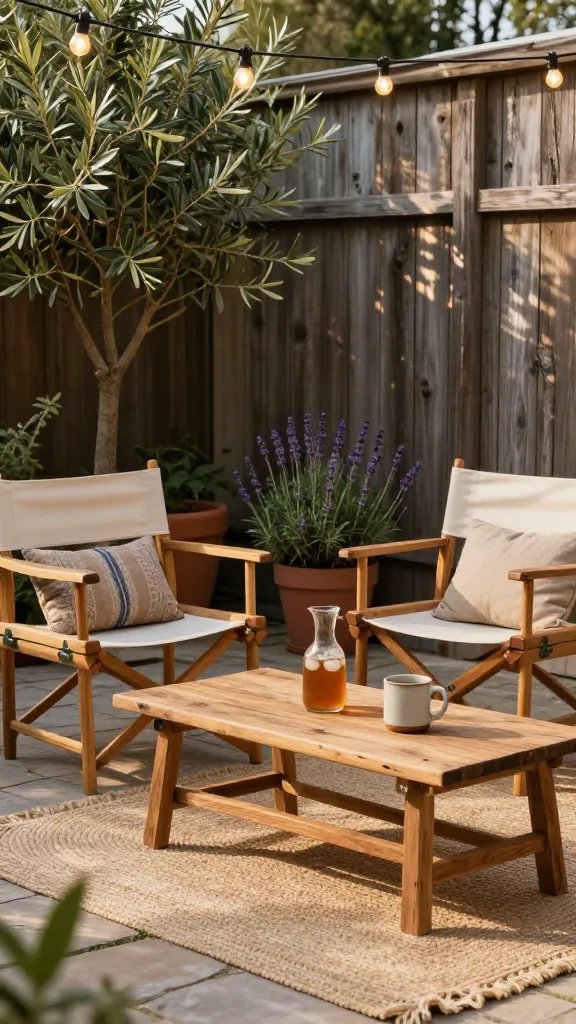
Skip expensive sets. Mix a couple of solid wood chairs with canvas or jute elements for that boutique inn vibe.
What To Look For
- Thrifted teak or acacia frames
- Neutral canvas director’s chairs
- Jute or flatweave outdoor rug
Keep cushions neutral and add one patterned pillow max. The restraint reads elevated and rustic-chic.
8. Use Galvanized Troughs As Raised Beds
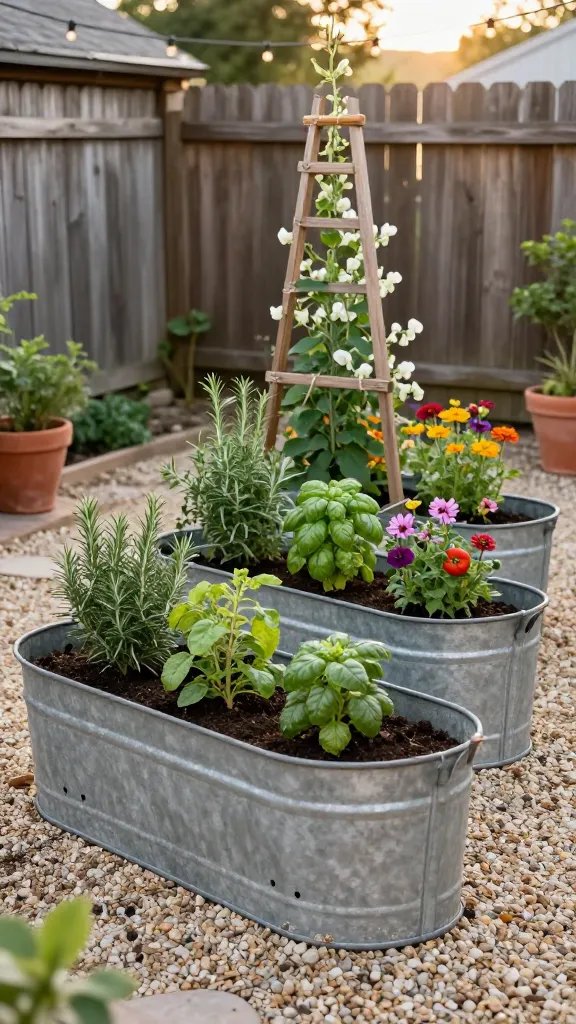
Stock tanks = instant farmhouse garden. They last forever, look intentional, and reduce bending while you weed.
Setup
- Drill drainage holes in the bottom.
- Layer gravel, then soil and compost.
- Plant herbs, tomatoes, or cut flowers.
Arrange two or three in a row with a pea gravel surround. Add a wood trellis for height and boom: magazine spread vibes.
9. DIY A Split-Log Or Pallet Edge
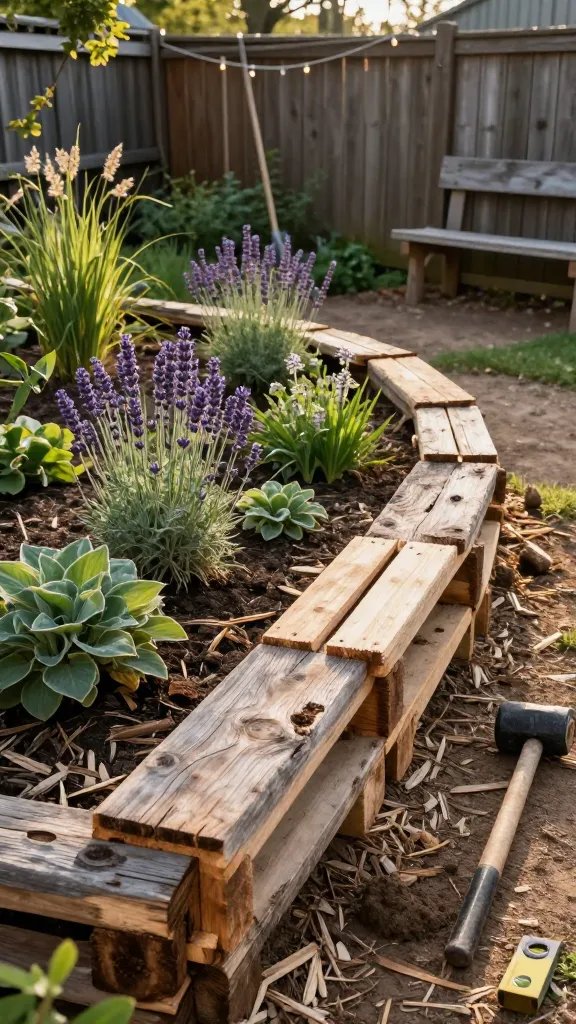
Define beds with rustic edging instead of plastic borders. Split logs or pallet boards create a textural, old-world frame.
How-To
- Cut logs or pallet planks to 12–18 inches.
- Dig a shallow trench and set pieces upright.
- Backfill and tamp for stability.
This detail adds craftsmanship to even simple plantings. It looks hand-built in the best way.
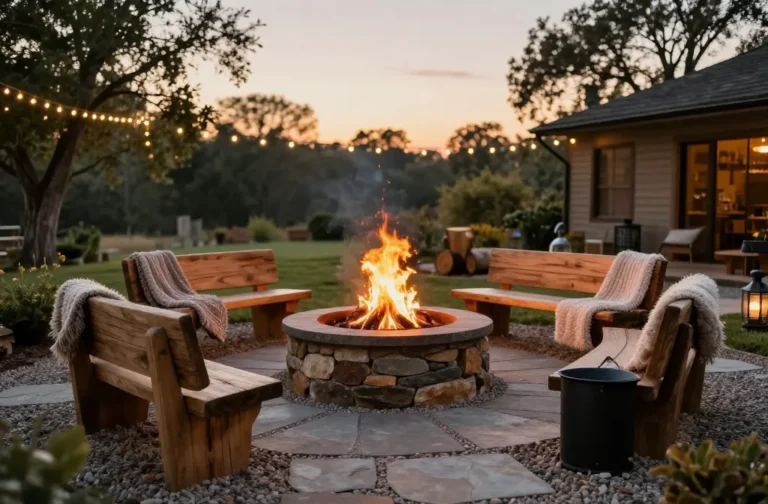
10. Make A Cozy Fire Feature On A Budget
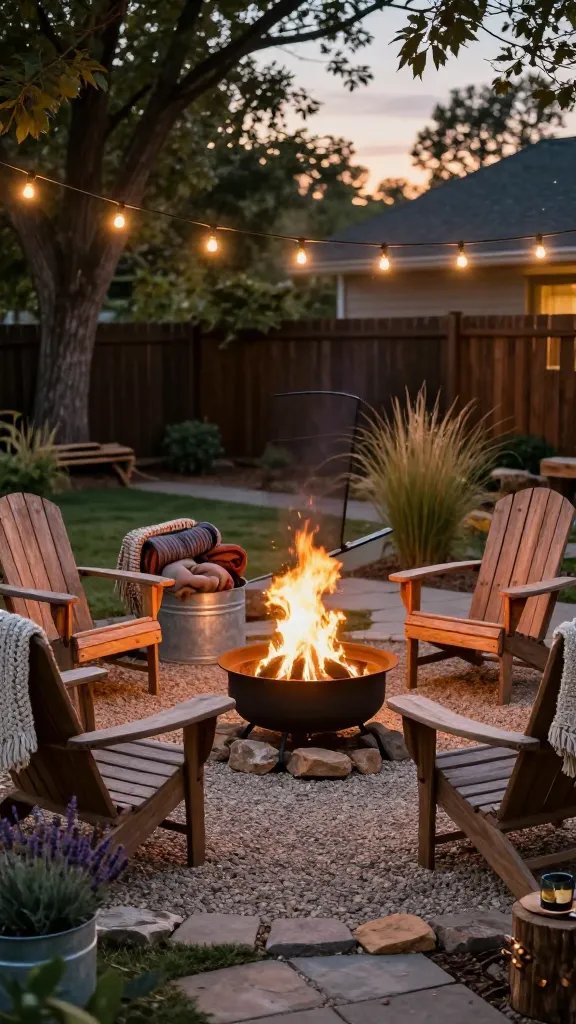
You don’t need a masonry crew. Grab a steel fire ring or bowl, surround it with stacked stone, and set Adirondack chairs around it.
Safety + Style
- Place on gravel or pavers, not grass.
- Keep a spark screen handy.
- Stash blankets in a metal bin for cabin-core vibes.
This becomes the hangout spot, from s’mores to stargazing. It feels luxe because warmth always does.
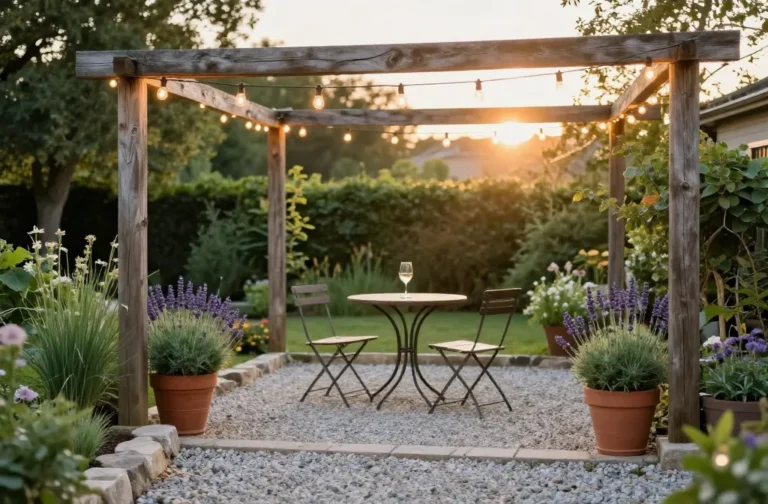
11. Add A Rustic Pergola (No Fancy Cuts Required)
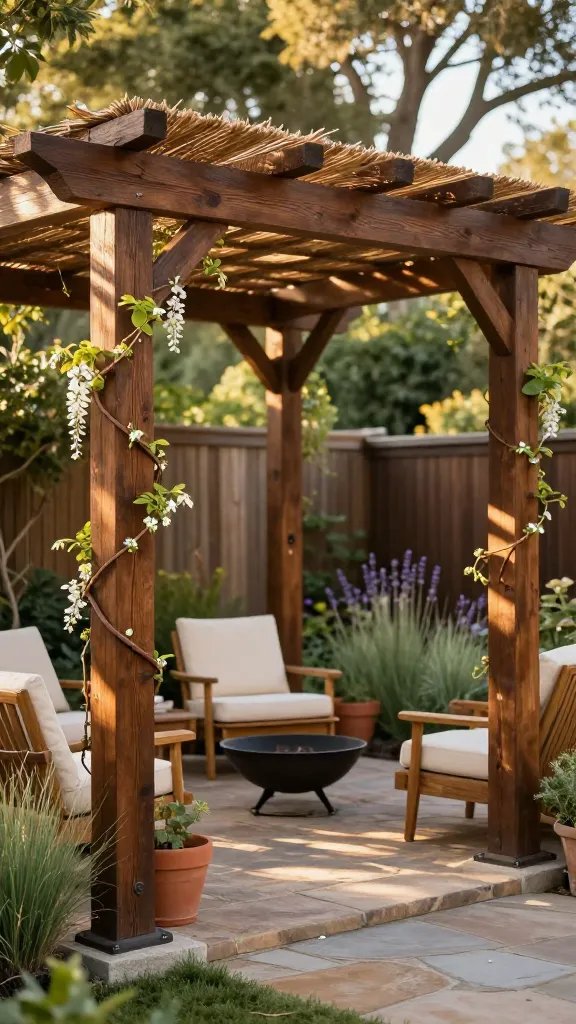
A simple pergola frames your seating area and gives shade. Use off-the-shelf 4×4 posts and 2×6 crossbeams—no joinery skills needed.
Pro Moves
- Anchor posts with concrete or strong post bases.
- Stain a deep brown for instant patina.
- Weave reed fencing or outdoor fabric on top for dappled shade.
Train a climbing vine (wisteria, jasmine, or hops) to add life. The structure elevates everything under it.
12. Layer Textiles: Blankets, Poufs, And A Rug
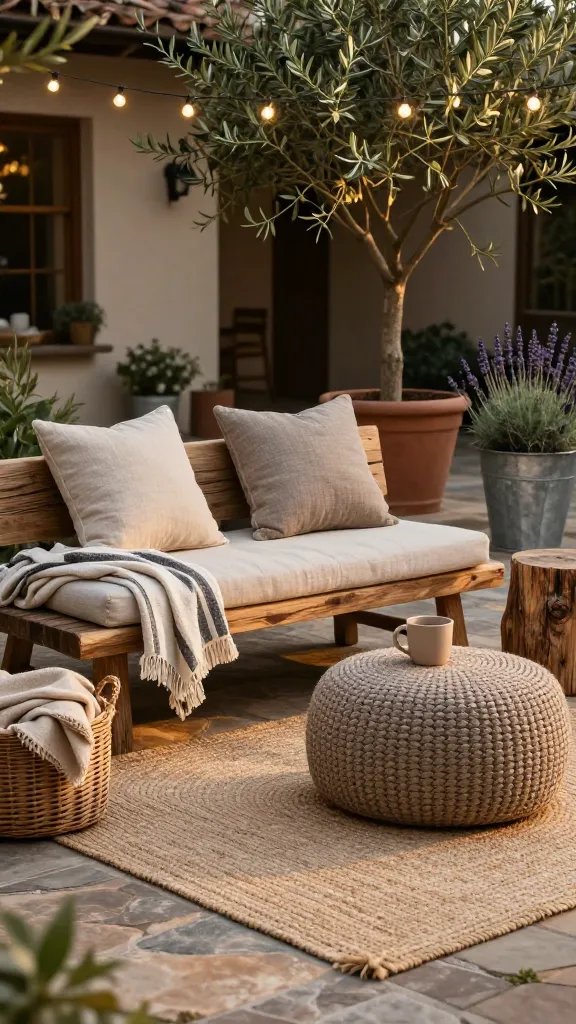
Soft goods make outdoors feel like a living room. Stick to natural textures—cotton, linen, jute—for that rustic edge.
Quick Styling
- Outdoor jute-look rug grounds the zone.
- Striped throw and two neutral pillows—done.
- Weatherproof pouf = extra seat or side table.
Rotate textiles seasonally to keep it fresh. Small swap, big impact, trust me.
13. Install A DIY Water Feature With A Whiskey Barrel
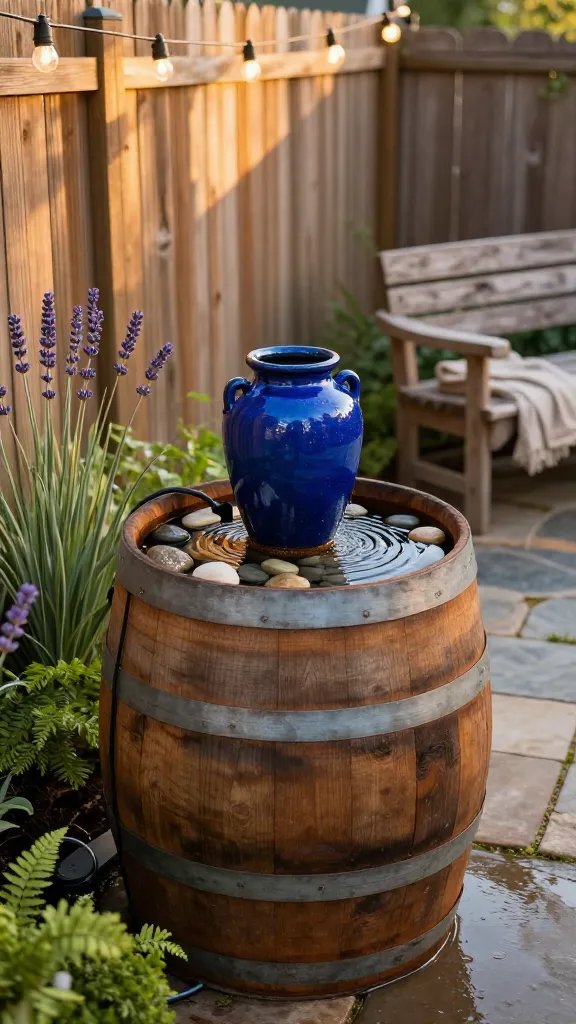
Moving water screams luxury, but you can DIY it. A half whiskey barrel, a small pump, and a ceramic pot create a soothing fountain in an afternoon.
Materials
- Half barrel or large tub
- Submersible fountain pump
- Center vessel (urn or glazed pot)
Hide the pump cord with river stones and plant moss around the base. You’ll get spa energy for the cost of a dinner out.
14. Create A Moody Accent Wall With Limewash Or Stain
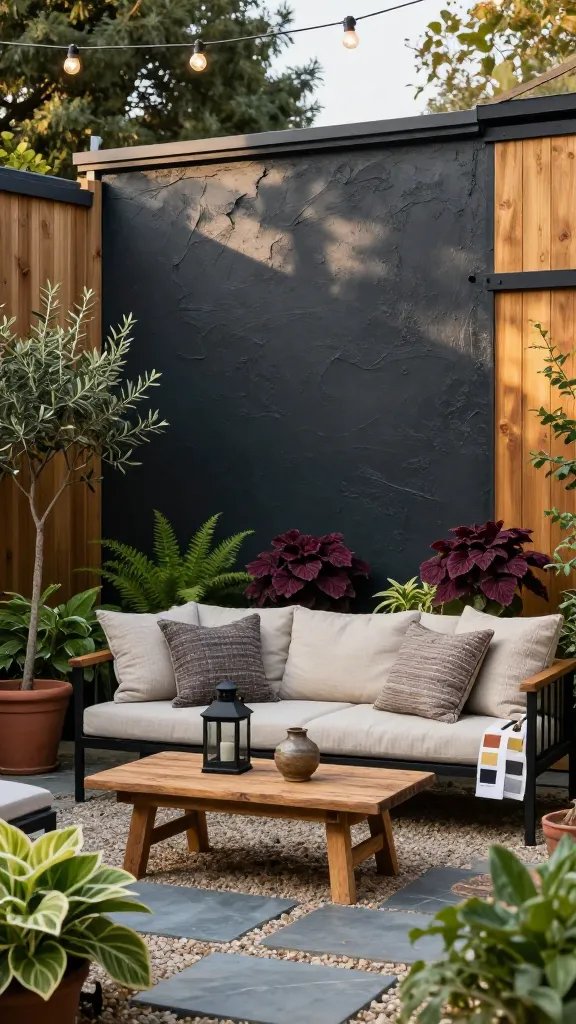
Pick one surface—fence, shed, or backdrop wall—and give it a tonal, weathered finish. Dark stain or limewash instantly makes plants pop and looks artisan-made.
Application Tips
- Test swatches in sun and shade.
- Brush in irregular strokes for patina.
- Pair with warm wood and black metal for contrast.
Use this as a photo-ready backdrop for dining or lounge zones. It feels curated and expensive with minimal effort.
Ready to give your backyard main-character energy? Mix two or three of these ideas this weekend and watch the whole space transform. You’ll get warmth, texture, and big-design payoff without the big spend—seriously, your patio’s about to glow up.